Pressure Canning for Beginners
A First Timer's Guide
Earlier this winter, my lovely new neighbors down the road asked if I’d show them how to pressure can. After the chaos of the holidays had passed, of course. They make pickles and jams occasionally, but pressure canning is a whole new adventure (and, honestly, a bit intimidating).
I get it, I was pretty freaked out the first time, too.
This newsletter may contain affiliate links.
Now, nearly two decades on, and the sound of a pressure canner running in my kitchen is no different than the dishwasher humming in the background. Just another noise the kitchen makes.
The holidays have now come and gone, and I’m looking forward to hosting them…but I’m a bit stuck on where to start. When you’ve been doing something for a long time, it can be tricky to break it down.
(Try to teach a kid how to tie their shoes, or ride a bike, or swim, and you’ll see what I mean. Once you learn…you just do it without thinking about it.)

So, my lovely friends across the internet, as I think about where to start, maybe you’ll allow me to rehearse a bit with y’all.
Some of you are likely experienced pressure canners and can help me out here, but I imagine many of you have never seen a pressure canner in real life and have lots of questions.
I’ll walk you through it, hoping you’ll ask lots of questions because it’s been a long time since I’ve been a beginner…and I don’t remember the parts that are just not obvious when you’re starting.
(I do have a Beginner’s Guide to Pressure Canning up on the blog, and it covers all the technical details in exhaustive detail, but I’m hoping to welcome my neighbors with something a bit friendlier than a lecture. If you do want all those details, that’s a great place to start.)
Step into my kitchen, would you?

Pressure Canners
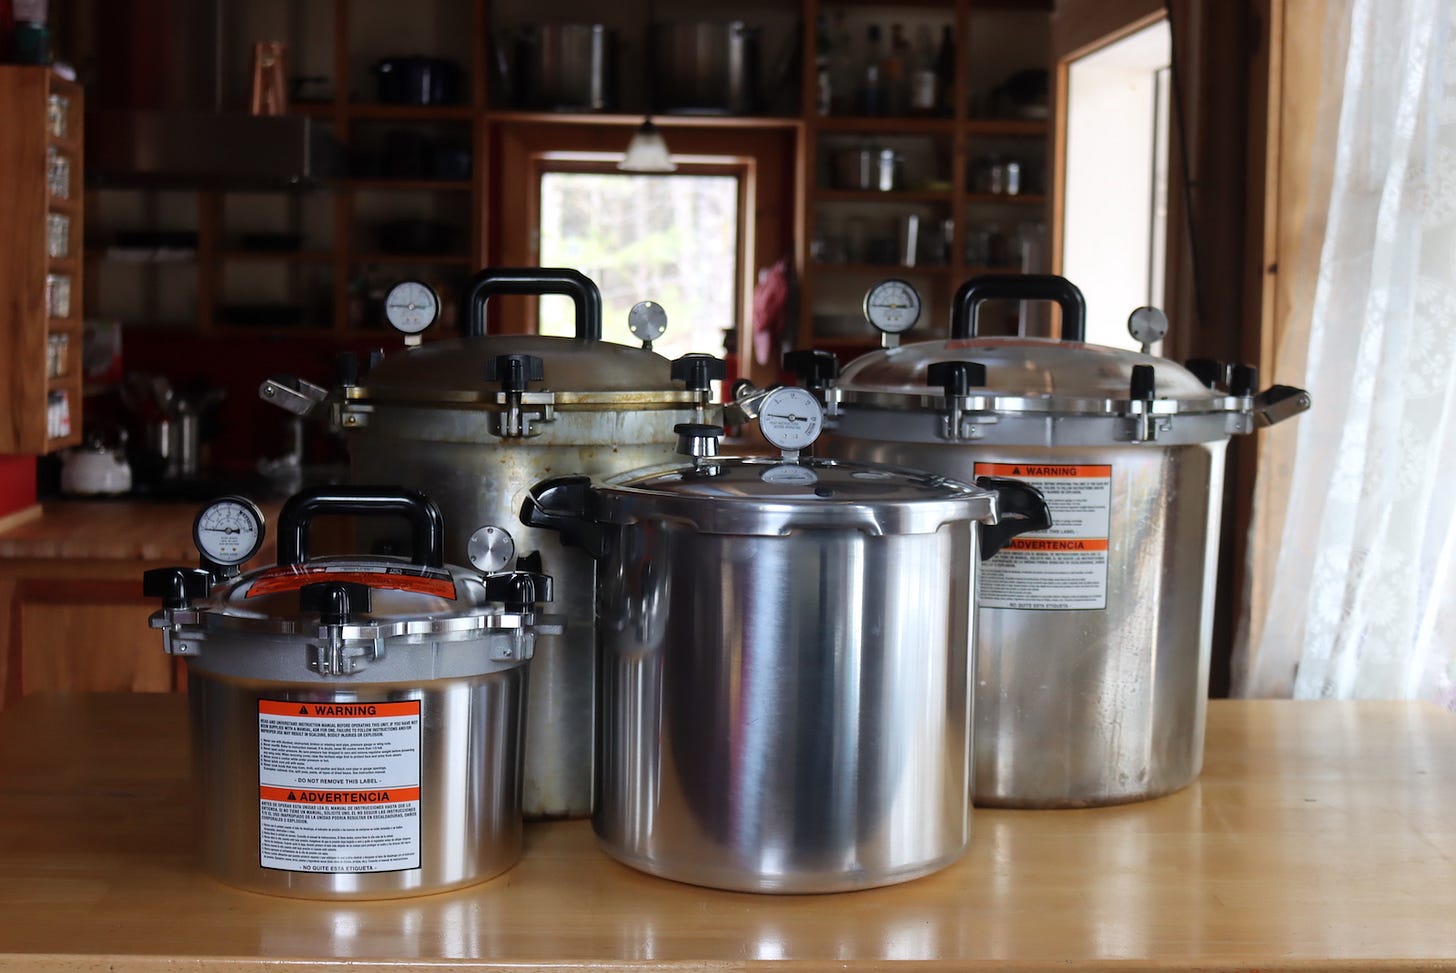
So, if you’re coming over to my house, you’re lucky because you’ll get to fiddle around a couple of different types of pressure canner since I’m working on writing a review of different brands this coming year for Creative Canning.
There are three main types: Weighted gauge, dial gauge, and electric.
Weighted Gauge Canners (what I use) are much easier to use but a bit more expensive. They’re self-regulating, meaning that the weight keeps them at the right pressure and rocks to allow
steam to escape, so you can set it up and then go about your other household business. You’re nearby, but you don’t have to babysit them.
They last forever and don’t require maintenance or replacement parts. They don’t wear out or break. They just work.
More money up front, but less money and time down the line.
The most common weighted gauge manufacturer is All American Brand Canners, and the size you’d use just depends on how much you want to preserve at once.
Dial Gauge Pressure Canners are cheaper, but they need regular maintenance, testing, and replacement parts when gaskets wear out. They’re also harder to use, and you need to stand there and babysit them while they run, constantly adjusting the stove to maintain the proper pressure.
The gauges get out of whack over time, and this type needs to be tested at your local agricultural extension office. (In Vermont, we don’t even have one, so I couldn’t get it tested within 6 hours of here, in any case.)
What you save in money upfront, you’re going to pay for in time spent babysitting the canner (which is significant, given that many batches take 90 minutes to run) and in replacement parts.
Just my opinion, of course, and plenty of people love their Presto canners. I’d only suggest these if you’re an occasional canner, putting up a few batches a year, or preserving for just 1-2 people.
Electric Pressure Canners are pretty new, and they all work a bit differently. It’s more than I’ll go into here.
Just quickly, don’t can in an instant pot; they don’t get hot enough to preserve the food (even the ones with a canning setting). I’ve tried the Carey/Nesco canner, and I hate it (too hard to use).
The Presto electric canner works great is completely intuitive to use, and is mostly automated. (Batch sizes are limited to 4 jars though, which is the main drawback.)
Since the process is a bit different for electric canners, I’m not going to talk about those, but you can read about how to use an electric canner if you’d like.
Basic Pressure Canning Process
So first, let’s walk through the basic process so you know all the steps (even if you’re not entirely sure about the hows and whys of each).
Start with pre-heating your pressure canner.
Take off the lid, add 2-3 inches of water to the bottom, and put in the bottom trivet.
Pressure canning is done with steam, so you don’t fill the canner up all the way, and you don’t cover the jars with water. You just need enough water in the bottom to make steam and make sure it doesn’t go dry.
Start it gently heating while you prepare your jars.
So, I’ve cast about trying to figure out what I should make with my neighbors for their first batch. There are hundreds of tested pressure canning recipes out there, some as simple as meat or veggies in a jar, other’s that get quite elaborate.
I’ve decided on a simple raw-pack meat recipe.
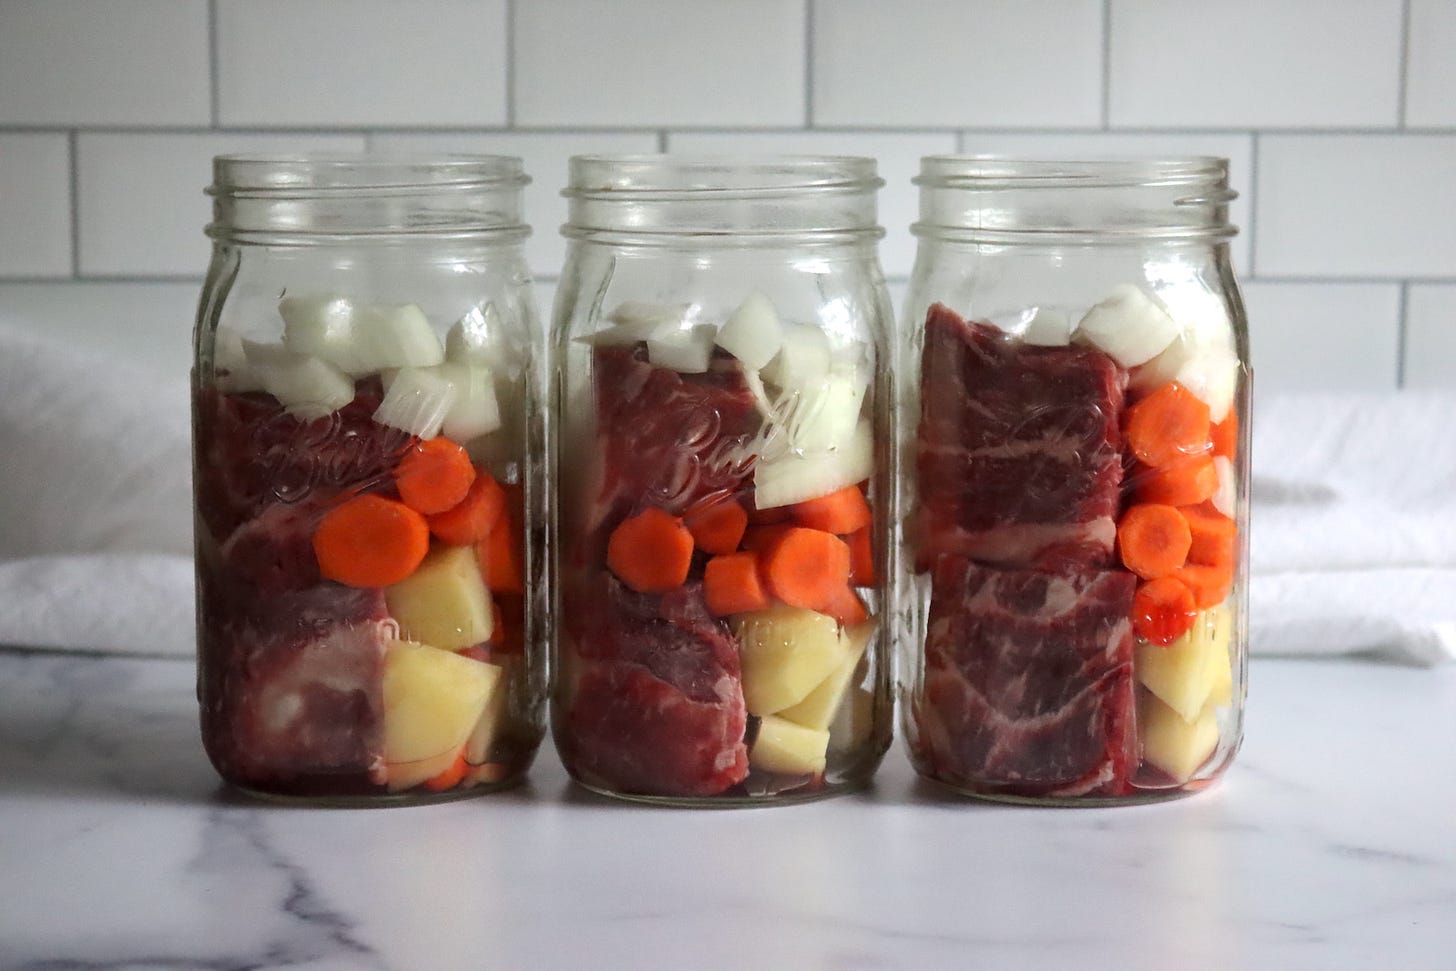
Ball canning is going towards all raw pack recipes in their newer canning books, and all they have you do is chop the meat or veggies and stuff them into the jar at room temperature. It’s by far the simplest and cleanest way to get started.
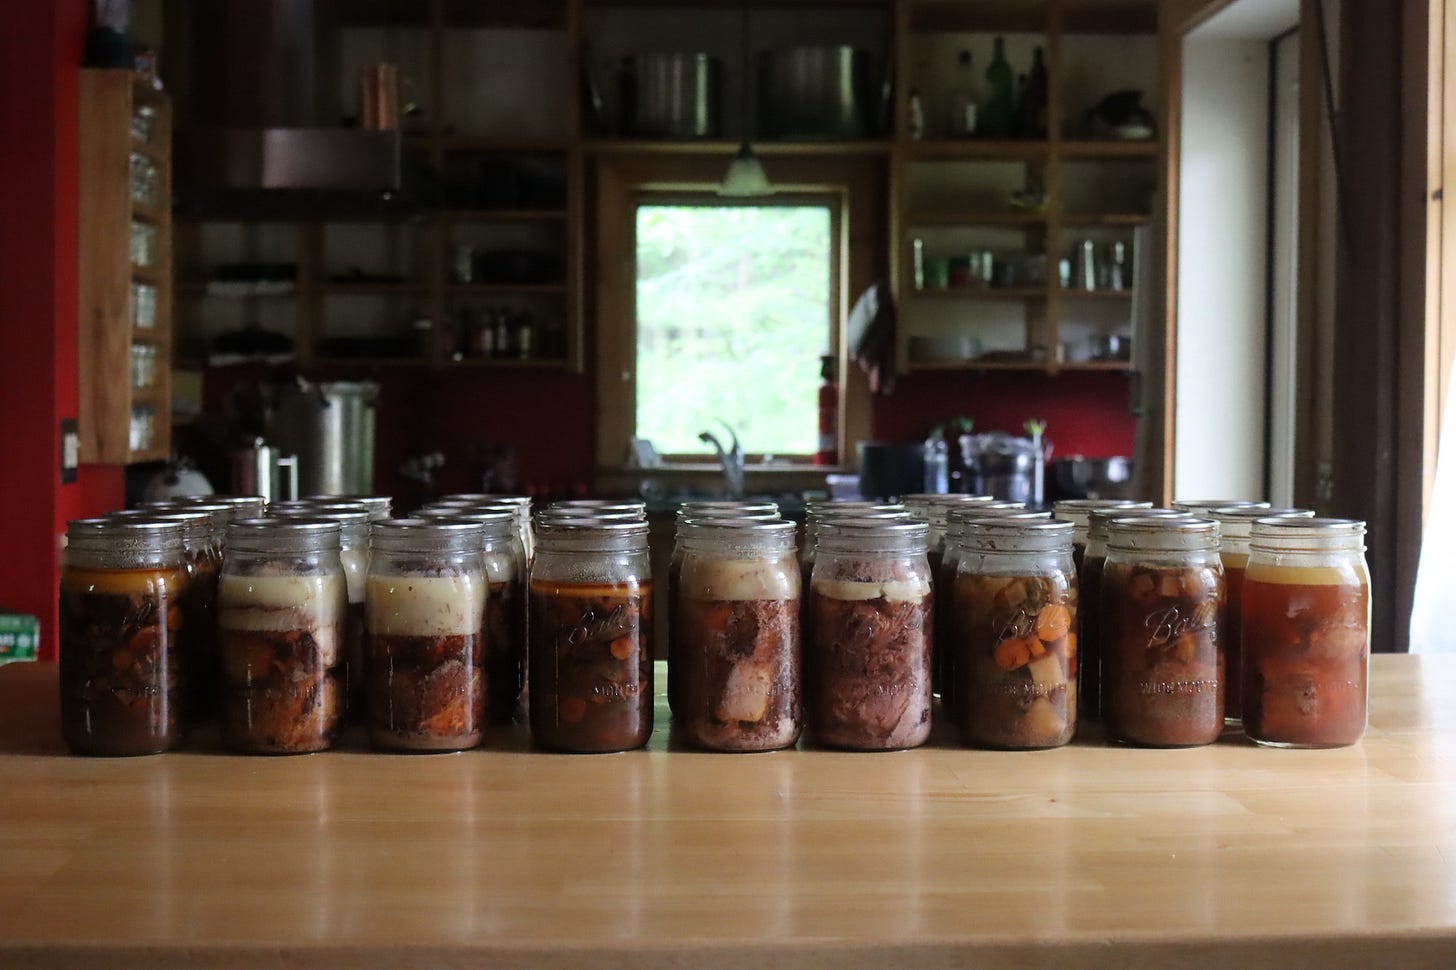
So here, I’ve chosen pot roast in a jar, which is just big hunks of beef chuck with veggies. The nice thing about pressure canning is you can use inexpensive, tough, but flavorful cuts, and they both cook and tenderize during canning.
Take clean empty jars, and pack them with the ingredients from your recipe.
Most pressure canning recipes have 1’’ headspace, which means you’re going to stop right at the bottom of the neck of the jar, right below where the threads start.
Don’t forget the salt. It’s optional for preservation, but pretty essential for taste. The general guidance is about 1 tsp per quart or 1/2 tsp per pint, but you can use however much or little you want.
Bring broth (or water, or whatever you’re using for your canning liquid) to a boil on the stove, and pour it over the top of the ingredients in the jar, coming right up to your headspace line.
Wipe the rims, and then screw on two-part canning lids, the same as for water bath canning.
Load the jars into the pre-heated pressure canner, on top of the bottom trivet.

Seal the lid on the pressure canner, and turn the heat up to high, but don’t put on the canning weight yet.
The canner has to come up to a hard boil inside and vent steam for 10 minutes before you add the canning weight.
Wait for the canner to start venting steam, then set a 10-minute timer. When the timer goes off, put on the canning weight.
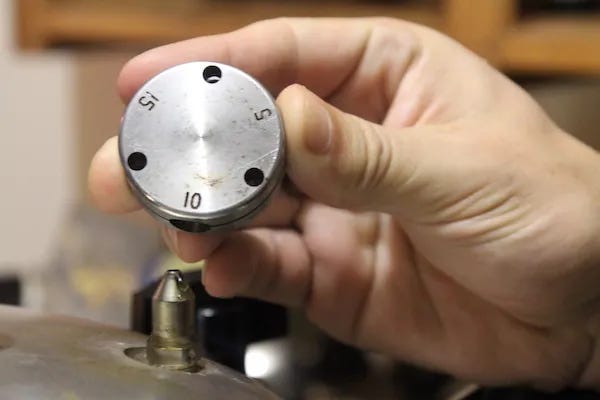
Canning times are always the same for any given recipe, but the pressure you use depends on your altitude. (So if a recipe says to process for 60 minutes, you’d do that time at sea level or 8,000 feet…but the pressure setting would change at a higher altitude.)
With a weighted gauge, like I use, it’s simple. At or below 1,000 feet in elevation, you use 10 pounds of pressure. Over 1,000 feet, you use 15 pounds.
The 5-pound setting is only on there for people who like to pressure can things that can otherwise be water bath canned (like fruit). For meat and veggies, the minimum pressure is 10 pounds.
Once the canner comes up to pressure, set your timer for whatever the recipe requires. Some are as little as 20 minutes for things like broth, and most soups are around 60 to 75 minutes. Anything with seafood in it is 100 minutes. That’s kinda the range.
Process at temperature, and then when the timer goes off, turn off the heat.
Allow everything to cool completely, then take off the weight and unload the canner. Check the seals, as you would when water bath canning.
If the jars are sealed, remove the rings, give the jars a quick rinse, and then store them in the pantry.
That’s it.
What questions do you have? What did I miss? What’s stopping you from putting healthy meals in a jar right on your pantry shelf?
Leave me a note in the comments below.
Until Next Time,
Ashley at Practical Self Reliance
PS. If you’re looking for pressure canning recipes, I have plenty to share:


Comment via email:
Thank you for the great explanations. I received two cases of Ball jars, fresh veges from her half acre garden and stew beef from my m-i-l for a wedding gift. Plus she taught me to can. I have used her gift all my life.
I love that you are passing on a tradition that helps us to feed our family's and friends.
Must you cut food, especially dense foods like meat or squash, up into smaller, more uniform pieces?